Homestead Yogurt
If yogurt is something you’re looking to take off of your grocery list in 2026, look no further! Making yogurt is actually easier than a lot of people think but it does take quite a bit of time and patience.
I’ve laid it all out step by step for you along with a graphic to screenshot at the bottom and links for everything to make the best yogurt at home!
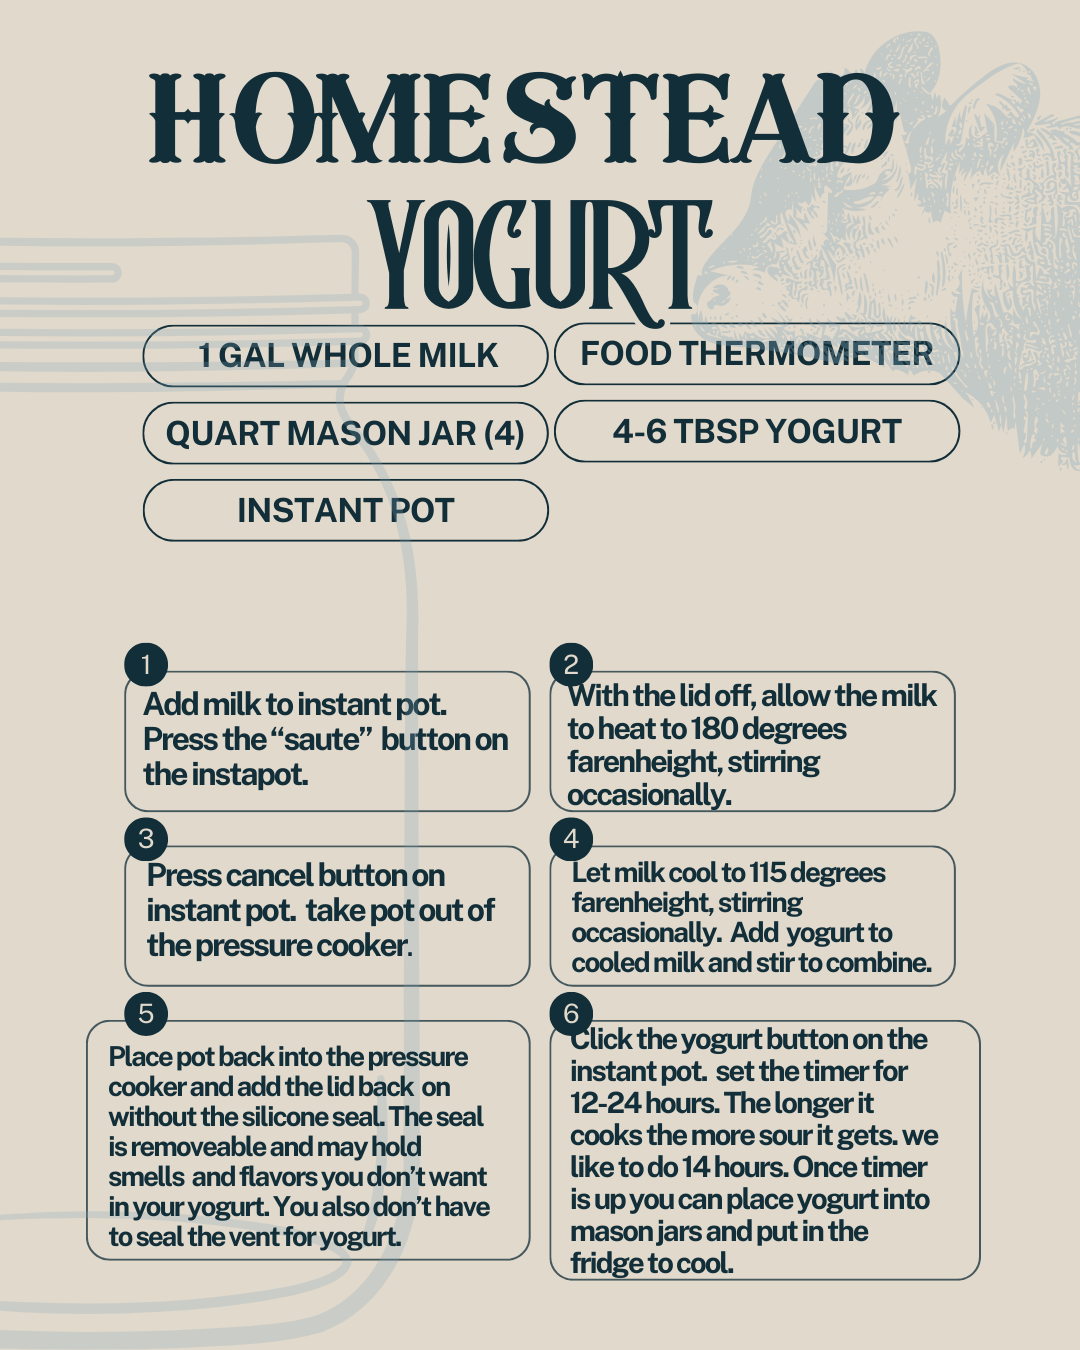
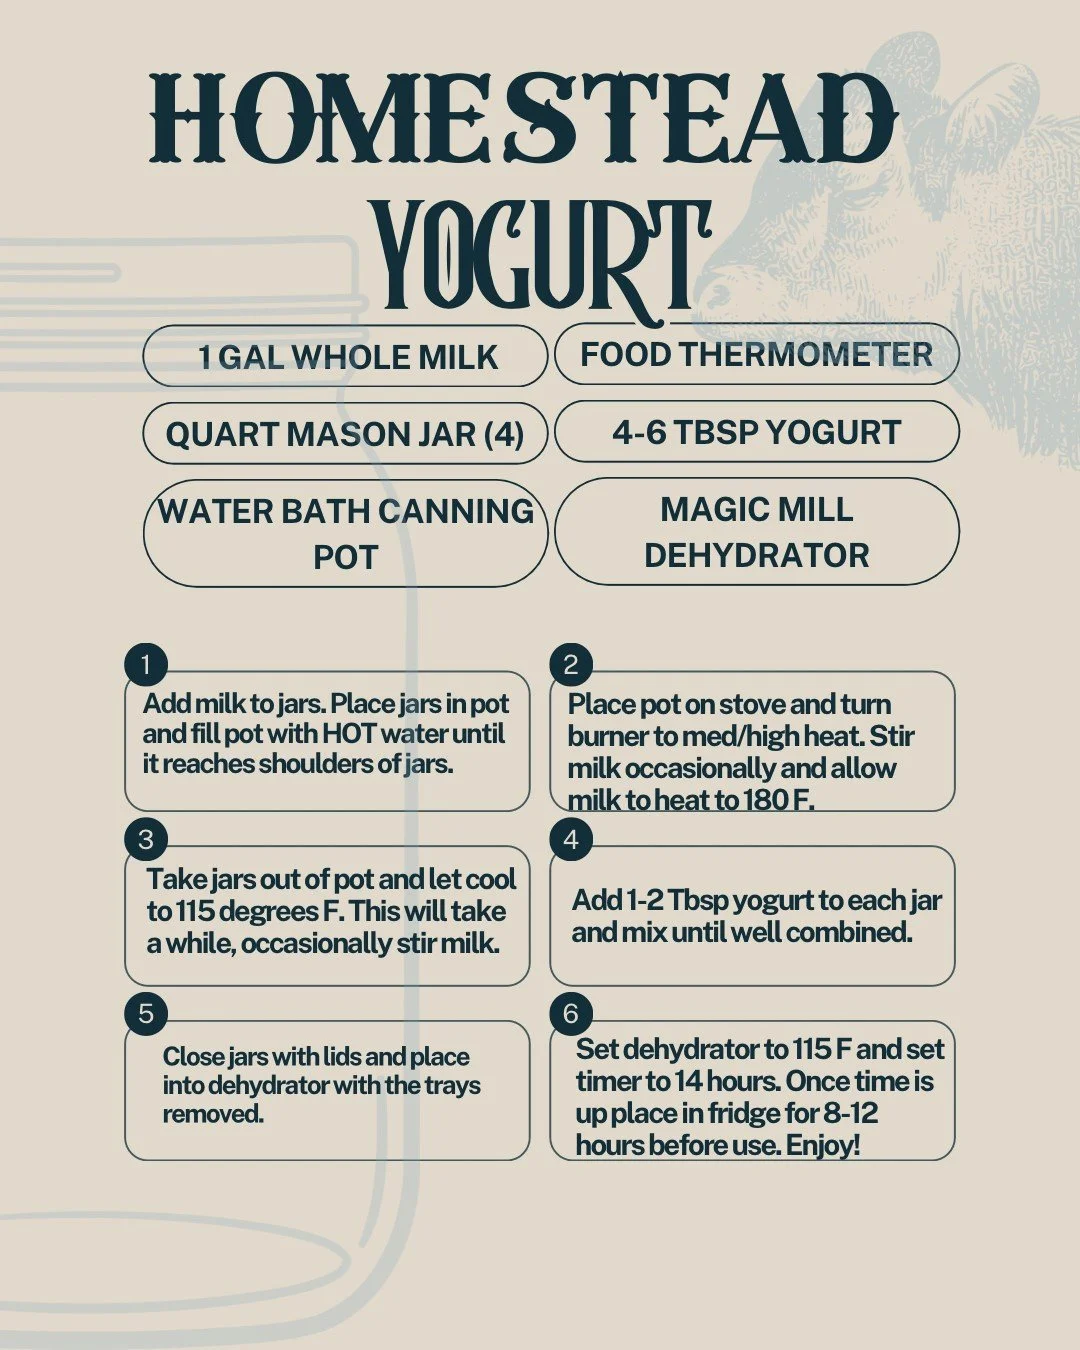
I’ve made yogurt a few different ways, and I've found that using a water bath canning pot and a dehydrator with removeable trays is the easiest most efficient way. You can also make yogurt in an instant pot as well, but it’s a little more messy and involves more dish washing. I’ve created two graphics that I’ve added for you at the bottom, one for making yogurt with a dehydrator and one for making yogurt with an instant pot.
WHAT YOU’LL NEED (dehydrator version)
Wide mouth quart size mason jars - 4
Water bath canning pot (I linked one that includes a few accessories that are super helpful)
1 gallon of whole milk
4-6 Tbsp. of yogurt (yes, you need yogurt to make yogurt) Yogurt contains a specific live active bacteria that ferment milk’s sugar (lactose) into lactic acid, causing the milk to thicken and develop that tangy flavor. You’re essentially “feeding” the new batch of soon to be yogurt with the proper microbes. THE MORE YOU KNOW! To start out, you can use a store bought yogurt ( just make sure it states somewhere on the packaging “Contains live and active cultures. S.THERMOPHILUS, L. BULGARICUS, L. ACIDOPHILUS, BIFIDUS, and L. CASEI.) You could also use a “yogurt starter” if you don’t want to use store bought yogurt. Once you have made a batch of yogurt, simply set a few Tbsp. aside to use for the next time you go to make yogurt.
Food thermometer
dehydrator- I linked the one I use at the bottom of the page
HOW TO
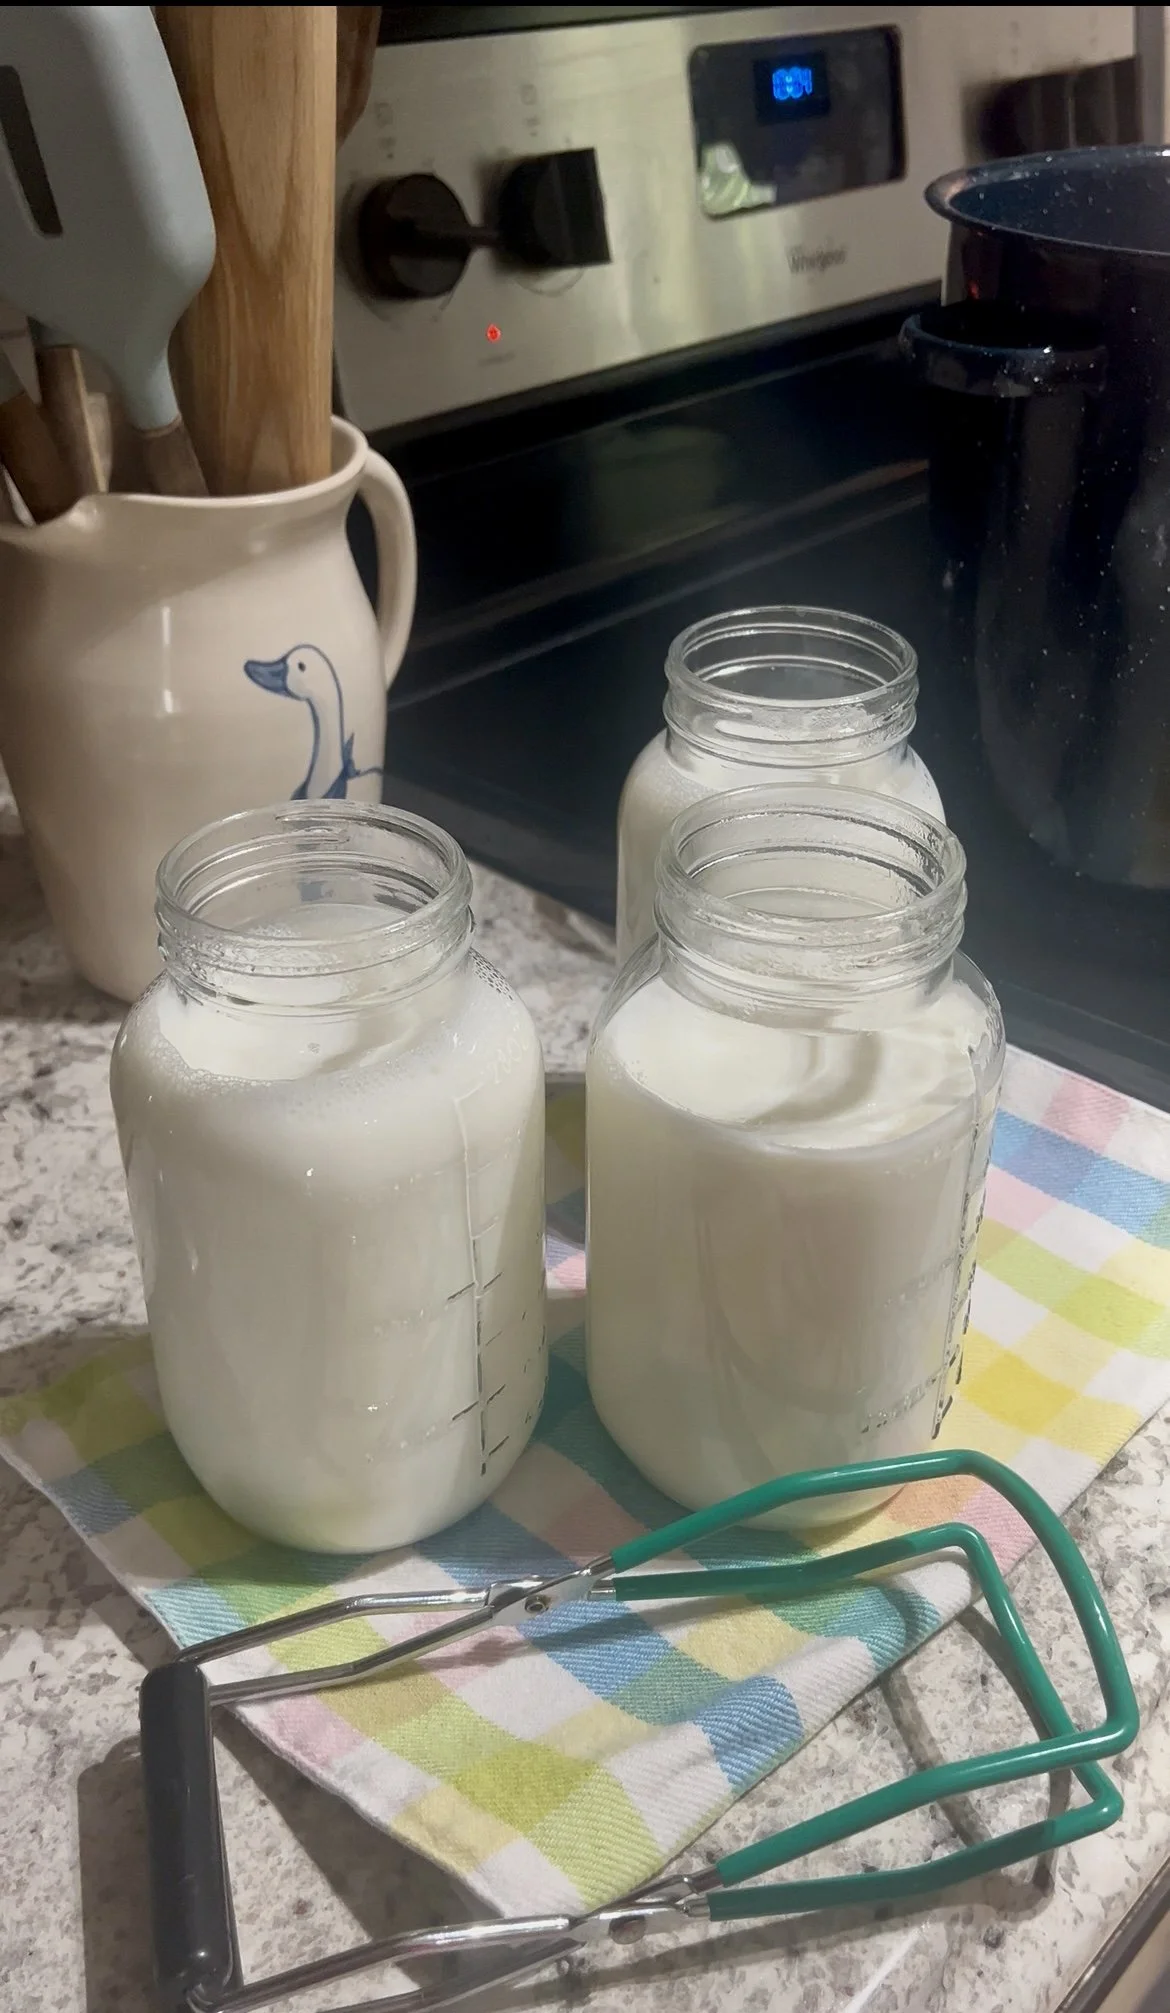
Add milk to clean mason jars. Place the jars gently into the water bath canning pot and fill the pot with HOT water until it reaches the shoulders if the jars ( where it starts to curve closer to the top.)
Gently place the pot onto the stove and turn the burner on medium-high heat. The water will begin to heat up as well as the milk in the jars! Stir and temp check your milk every few minutes. Once the milk reaches 180 degrees Fahrenheit, slowly remove the jars from the pot and place on a dry towel on the counter. These jars are VERY hot! Do not use your bare hands to take them out! The pot I linked includes grabbers that you can use to safely remove the jars.
Allow the milk to cool to 115 degrees Fahrenheit, this will probably take over an hour. Continue to stir and temp check the milk every once in a while.
Once the milk has reached 115 degrees Fahrenheit, add about 1-2 Tbsp. yogurt into each jar of milk and stir until fully combined. Screw the lid onto the jars.
Remove the trays out of your dehydrator to make room for the height of the jars. Plug in the dehydrator and set the temp to 115 degrees. place the jars inside the dehydrator and set the timer to 14 hours. You can ferment yogurt any where from 12-24 hours, the longer it sits the more sour it gets. We have found that 14 hours is the sweet spot for our family, but feel free to play around with the time to see what works for you.
Place in the fridge to cool and enjoy!
Everything you need to make yogurt-
The links listed are affiliate links and I make a very small commission when you make a purchase. Thank you for supporting me!